eSIM Card Android – Complete Guide to Setup, Use, and Benefits

Want true global mobility so you can stay online whether you’re exploring the sights of Tokyo, on safari in Africa, or flying to a business conference in New York? Nothing is simpler nowadays with an eSIM card Android. In this guide, we will answer all your questions: how to get your eSIM (free or paid), choose the right plan, start using it on any device, and switch between eSIMs effortlessly. Let modern technology transform your travel convenience!


What Is an eSIM Card for Android and How It Works
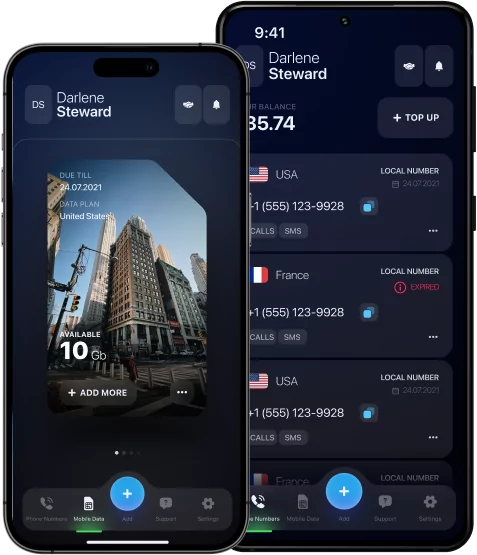
An eSIM is an electronic chip that can replace a traditional SIM card with almost no difference in function. The only difference is you need to scan a QR code for activation instead of physically switching cards. The capabilities for data, calls, and SMS remain exactly the same. Even if you’ve never used this tool, it won’t be difficult to start.
Why eSIM Technology Is the Future of Mobile Connectivity
There are some advantages of an eSIM over a usual SIM card:
- It provides fast activation (all process takes less than 5 minutes including time for purchase);
- It’s easy to manage in any country from a single app;
- You can have multiple eSIMs at once and switch between them on your device without hassle;
- Some eSIMs, like eSIM Plus, don‘t even require a passport to get started.
With all these benefits, it’s clear why eSIMs for Android are becoming more popular in the digital era.
How to Check if Your Android Device Supports eSIM
Almost every modern smartphone and tablet is compatible with an eSIM card Android. For example, if you have a Redmi Note 13 Pro+, Xiaomi 12T Pro, Huawei P40, Samsung Galaxy S20, or a newer version of these models, you have nothing to worry about in most countries.
You can find information about your device’s eSIM support on the provider’s website, in your mobile settings (Network & Internet → “Add eSIM” or “SIM Manager“), or by using the easiest option — enter *#06# on your phone’s dialer (just as you would dial a regular phone number). If you don’t see an EID on your screen, eSIM is likely not embedded.
How to Use eSIM Card on Android Phone — Step-by-Step Setup
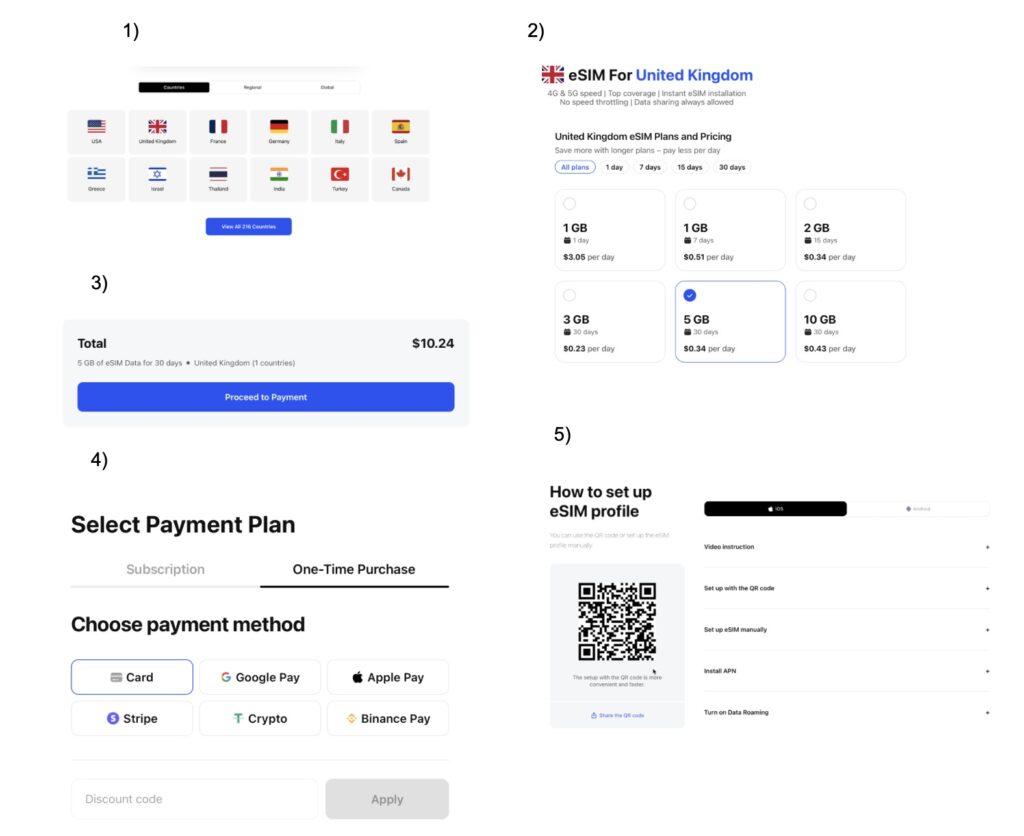
For a successful setup, you need to visit the official website of your chosen provider or download their app. Let’s look at the process using eSIM Plus as an example:
- Start by choosing a country and a data plan as shown in the screenshots.
- Tap the ‘Proceed to Payment’ button.
- Select a payment method and enter a coupon if you have one.
- Complete your purchase and automatically receive your QR code for activation.
- Scan the QR code to get internet access.
Installing eSIM via QR Code
Once you receive your QR code, simply take a screenshot on your Android and upload it from your gallery using the device’s scanner. If the process fails, try again. If it is still unsuccessful, contact the support team for assistance. Most users complete the process smoothly without any issues.
Adding eSIM Manually Through Carrier Settings
If your carrier doesn’t provide a QR code, you can still activate your eSIM by entering the details manually. This requires the SM-DP+ address (Subscription Manager Data Preparation server) and an activation code from your carrier. Go to your SIM settings menu and look for the “Add carrier“or “Enter code manually” option.
How to Switch Between Multiple eSIM Profiles on Android
To switch between multiple eSIMs, a user should go to Settings and press SIM Manager. There is an option to select a preferred card for calls and data. You can set this even before you cross a border of another country so that you will be in touch instantly and avoid roaming charges. If you don’t know how to use an eSIM card on an Android phone or how to activate them, refer to the previous abstracts of this guide.
Dual SIM and eSIM – Using Both on One Android Device
You can use a physical SIM and an eSIM together on a single phone in a dual SIM setup. This allows you to have two active phone numbers on one device. For example, a personal number is on the physical SIM and a work number is on the eSIM. You can manage which line handles calls, texts, and mobile data in your device’s connection settings.
Free eSIM Card Android – Is It Possible?
Yes, absolutely. There are trial apps and global platforms that give you a small amount of free data to try out the service. However, these offers are usually limited-time and are intended to lead to purchasing a full plan or a long-term subscription. If you’re still undecided about switching to an eSIM, a free eSIM Android trial will erase all your doubts.
Best Apps and Providers Offering Free eSIM Trials
Top providers like eSIM Plus, Nomad, and Airalo often give new customers short-term trial plans (500MB–1GB for 1–3 days). Others, like Ubigi or newer services such as Simbye, offer small free data packs or activation credits so you can test the network and setup for free. To get a trial of an eSIM card Android , visit their websites or contact their support teams.
Advantages of Using eSIM Card on Android Phone
Connectivity, flexibility, security, and privacy are among the key benefits and the best argument for using an eSIM card for Android. No need to wait for activation, worry about coverage, or struggle to compare the different offers from each operator abroad. It is an ideal solution for everyone who seeks maximum convenience, best value and minimum hassle with setup.
eSIM vs Physical SIM – Which One Should You Choose?
To answer ‘what is an eSIM card for Android compared to a physical SIM’ let’s analyze the main characteristics.
| eSIM | Traditional SIM | |
|---|---|---|
| Speed & Reliability | Same as physical. Uses the same networks (4G/5G). | Same as eSIM. Uses the same networks (4G/5G). |
| Convenience | Instant & easy. Activate in minutes with a QR code, store multiple numbers on one phone. | Requires effort. Buy in-store, then wait for activation. You should physically swap the card. |
| Compatibility | Growing fast. Works on most modern smartphones, tablets, and watches. | Universal. Works in any unlocked phone, old or new. |
Common Problems with eSIM on Android and How to Fix Them
Users can sometimes face issues like activation failure, a missing network signal, or QR code errors. To fix activation failure, manually enter the activation code from your provider in your SIM settings. For a missing network, go to your network settings and manually select your carrier. If a QR code won’t scan, request a new one and ensure your camera lens is clean. In case nothing helps, refer to a support team to get relevant advice in your situation.
How to Delete or Transfer eSIM to Another Android Device
If you need to delete the cellular plan profile from the old phone just go to your Android’s SIM settings, tap the eSIM and select “Delete.” In case you need to reset it, go through the same flow as it was already described above. Transferring eSIM from one Android device to another requires getting a QR code from your provider. The rest process is completely the same but keep in mind that eSIM will work only on one device at once.
eSIM Card Android: Your Key to Modern Connectivity
Experts call the eSIM card for Android the future of telecom because its user base grows exponentially and its instant switching between wireless providers grants a major mobility advantage. As we have proven, the eSIM surpasses the traditional SIM in fast activation, convenience, and flexibility, while maintaining the same connection quality. The only thing to ensure is your device’s compatibility, which you can check via three simple methods. The setup is straightforward, usually involving just a few selections in your Android’s SIM manager and scanning a QR code. Select a trusted provider like eSIM Plus and enjoy being connected anywhere in no time!